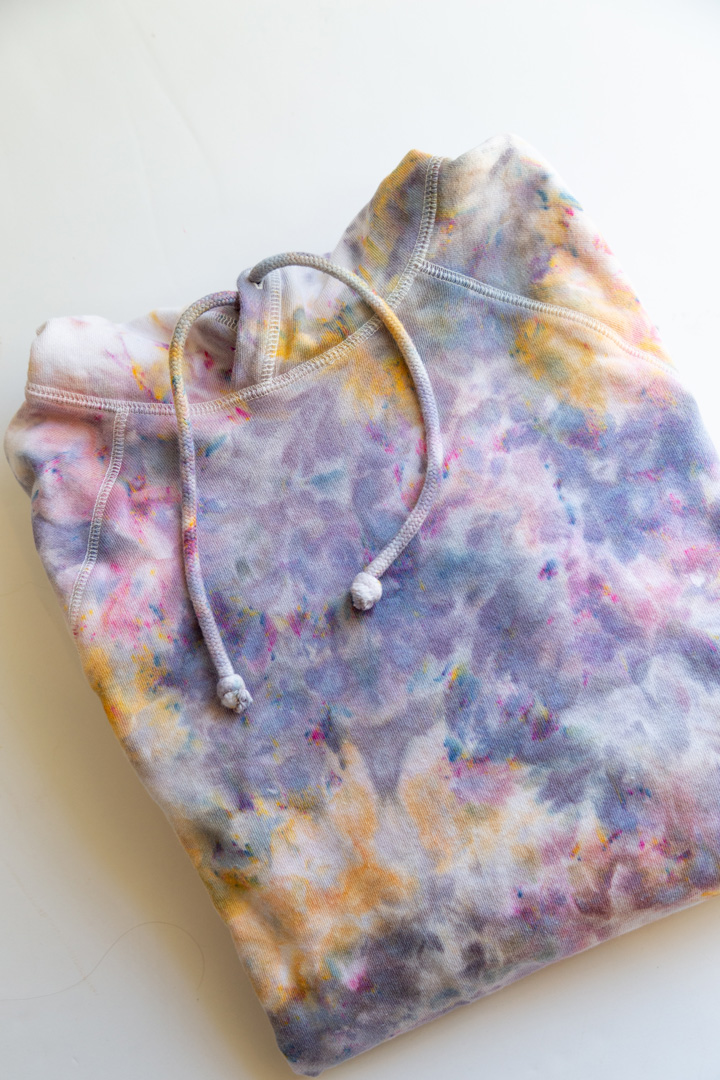
DIY Ice Dye Hoodie
You will fall in love with this tie dye technique! Check out our DIY Ice Dye Hoodie tutorial.

Have you jumped on the tie dye trend train yet? We are clearly obsessed! And if you haven’t tried the Ice Dye method, it is a must!
What is Ice Dyeing?
Ice Dyeing is a method of dyeing using ice, (pre-treated) fabric and fabric dye. The fabric is washed and kept damp. Fabric can be pre-treated with salt, vinegar or soda ash (depending on fabric and dye that you use). Then ice is placed onto of bunched fabric and powder dye is applied to ice.
The melting ice gives the water color effect as you allow the ice to melt over the fabric completely. When using multiple colors of powdered dye, the dye can bleed or blend into each other showing different colors.
We have ice dyed cloth napkins and crew neck sweatshirts in the past. We even ice dyed turkish towels! Did you happen to see how we used powdered dyes this winter to do snow ice dye?!
Ice Dyeing Tips
What material can you ice dye?
Natural fabrics like cotton, linen, wool, and silk work best. The dye can absorb into natural fibers more than synthetic.
How long does it take to ice dye?
The melting time for ice depends on how warm it is outside (or inside) when dyeing. Typically we like to allow the ice to completely melt (a few hours) and then allow the dye to sit on the fabric for another few hours.
Can you use liquid dye to ice dye?
Powdered dye works best for ice dyeing. The powder dye melts into the fabric creating a watercolor effect.
What you need to make Ice Dye Hoodies
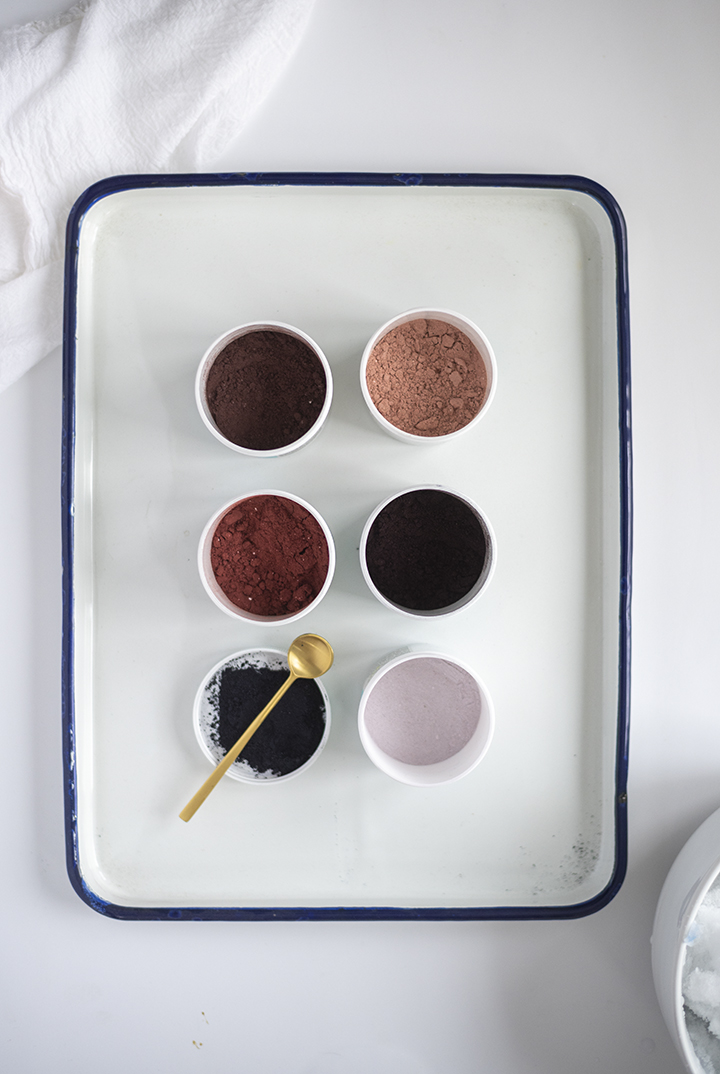
- Powdered fabric dye – In the past, we used Jacquard Procion Fiber Reactive Dye and Rit powdered dye. But for this project, we used the Dharma Trading fiber reactive dyes. For this project I used Timber Wolf, Amber Waves and Powder Pink.
- Ice
- Cotton white hoodie
- Or this white hoodie
- Cooling rack
- Bin
- Gloves
View this post on Instagram
How to make a DIY Ice Dye Hoodie
- Prep the cotton fabric. Wash with mild detergent to remove anything from fabric. Next soak the damp fabric in a soda ash warm water mixture. Follow instructions on soda ash label. I soaked mine for 20 minutes.
- Cover your work area (we use a white plastic tablecloth).
- Prep your supplies. Place cooling rack over the tray or bin to catch the melting snow and dye. I often use cheap aluminum cooking pans and plastic lids.
- Remove fabric from soda ash bath. Wring out the excess water. Bunch the fabric and place it on top of cooling rack.
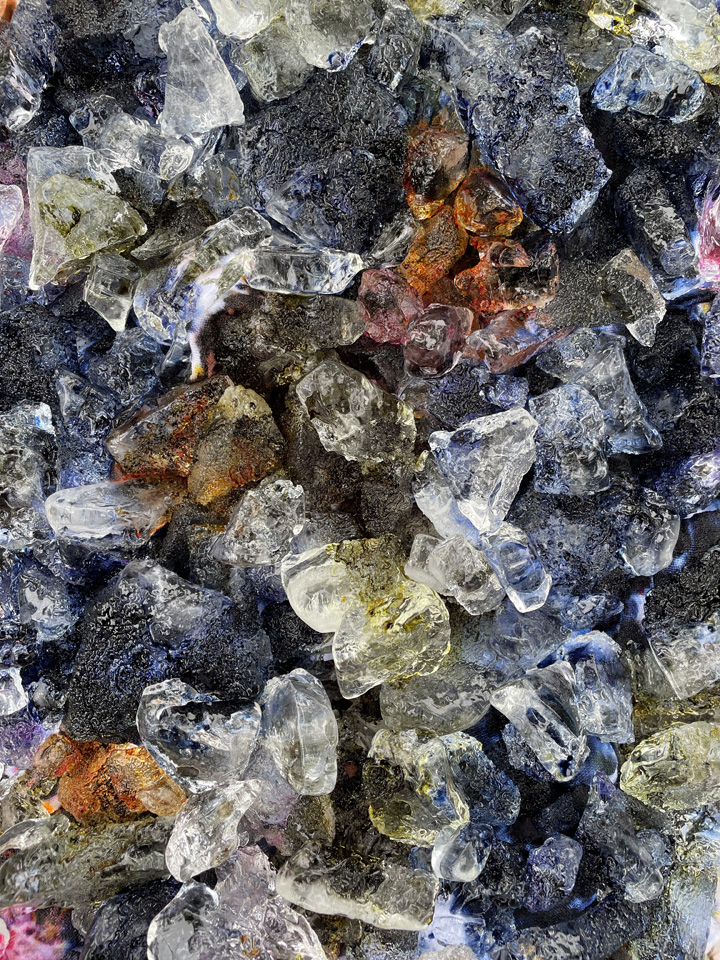
- Place ice on top of the fabric.
- Now it is time to sprinkle powdered dye on to ice with a spoon. A little bit goes a long way! You do not need a large sum.
- NOTE: If you use mulitple colors of dye, leave a little room in between where you spinkle the powdered dye so the colors do not overly blend.
- Allow the ice to melt completely. Depending on how warm it is, this could take a few hours. You can lightly spray the ice with water.
- Rinse in the sink carefully.
- Wash and dry.


If you want to dye the back of the sweatshirt, do you repeat the entire process to dye the back?
Hi there, Since you start the ice dye process with a wet sweatshirt or fabric, the dye should run through to the back of the sweatshirt. Mine did! You lay the garnet flat on the drying rack and scrunch.
What colours did you use for this hoodie?
I used Timber Wolf, Amber Waves and Powder Pink.