DIY Shaving Cream Marbled Paper

This past week, I was honored to do an Instagram takeover for our friends at Munchkin. I shared snippets of our life here in Crested Butte, along with some fun projects to try with the kids. We love to give our kids ways to explore creativity.
It was so fun to team up with Munchkin and create both big and small projects for kids using everyday items.
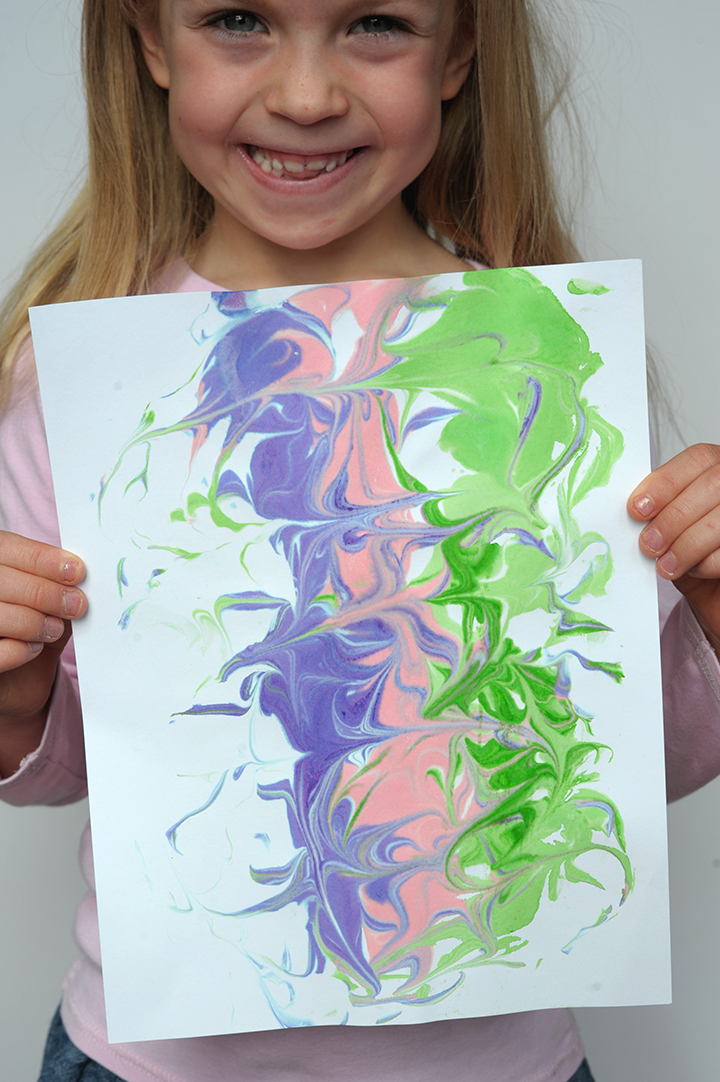
Our favorite project last week by far was DIY shaving cream marbled paper. Calla, who just turned six, could not get enough of this marbling project. She wanted to try every color combination she could think of and every which way to make a marbled design.
We’re sharing the how-to for DIY shaving cream marbling, along with our favorite homemade play dough recipe and some easy ways to spark creativity in your kids.
Read more for all the projects…
 DIY Shaving Cream Marbled Paper
This project is always such a hit in our house. The process is like magic for kids.
Supplies:
Shaving cream, food coloring or acrylic paint, white cardstock or watercolor paper, toothpicks or , ruler

How to make Shaving Cream Marbled Paper
Instructions:
- Spray shaving cream onto jelly roll pan or similar pan.
- Level out shaving cream with spatula.
- Squirt food coloring or acrylic paint onto surface of shaving cream.
- Swirl designs into your shaving cream.
- Lay paper down and pat it gently so all of paper is covered on underside with shaving cream/paint.
- Gently pull off paper and lay down with shaving cream side up.
- Scrape off shaving cream with ruler and let dry.

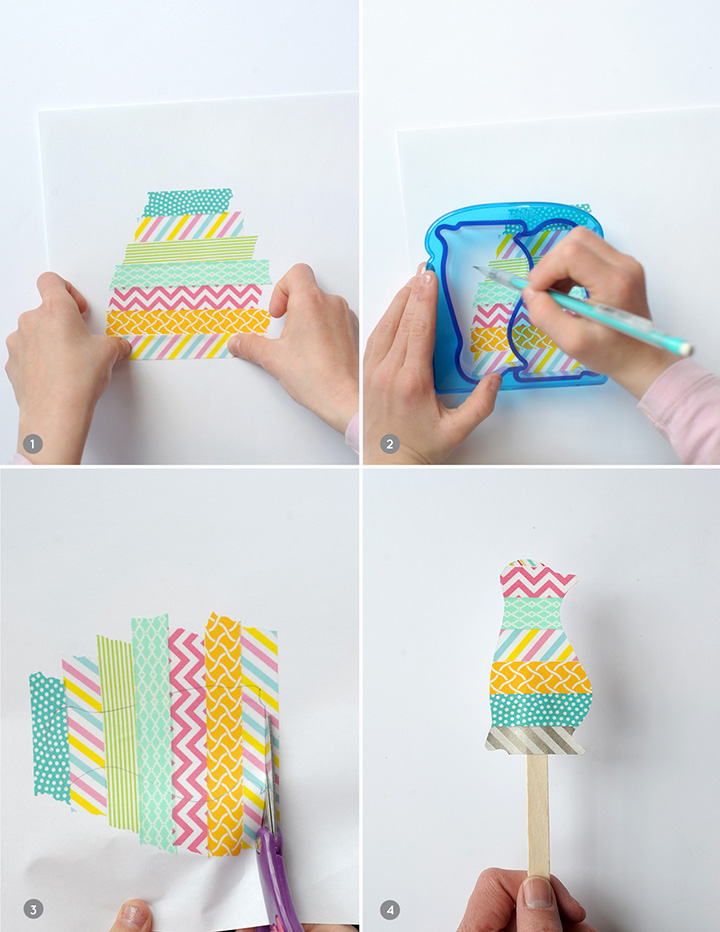
Washi Tape Animal Puppets
Kids love washi tape and animals, which makes this project a total hit!
Supplies: washi tape in different colors and patterns, scissors, , toothpicks
Instructions:
- Place strips of washi tape in rows on a piece of paper.
- Trace your shape with your
- Cut out shape.
- Tape toothpick on back side of puppet.
Our favorite play dough recipe
I got this recipe from a friend when Calla was little. We’ve been making it frequently ever since! I love to let her pick out her own colors and knead the dough all by herself.
1 ½ cup flour
¾ cup salt
1 ½ cup water
1 T vegetable oil
½ T cream of tarter
Instructions:
- Mix all of the ingredients together in a saucepan and over medium low, stir often for 5-7 minutes until play dough consistency. You can either add food coloring now or wait until you remove from heat so you can divide dough and make a few different colors.
- Remove from heat and let cool on wax paper.
- Knead dough for 3 minutes.
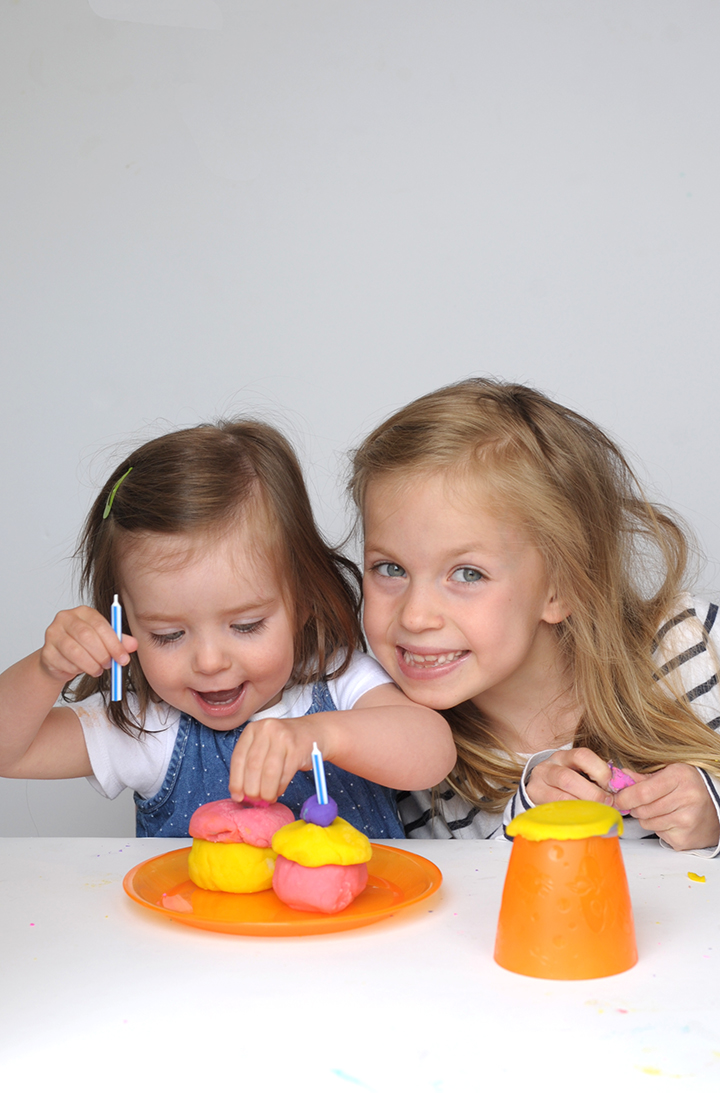
Whip up some play dough, pull some plates and from the kid’s stash and let their imaginations go wild.
My six-year-old, Calla, pulled some Munchkin plates and from the kid’s drawer in the kitchen and proclaimed she was making her own birthday cake and cupcakes. Then used a little play dough to secure her cake stand. She simply turned a cup upside down, added play dough and placed the plate on top. How fun!

DIY sweet notes
My husband, Alex, travels for work and we try to come up with ways to stay connected while he’s abroad. Last week, Calla used these foam letters to spell out messages for Daddy. Then I would simply take a picture of it with my phone and text it to him. It was great for Calla to practice her spelling and a fun way to let Daddy know she misses him.
Munchkin rids the world of the mundane by developing clever, innovative solutions that make family life safer, easier, and more fun. You can find Munchkin products at , , , , and Amazon. It’s the little things!
Hope you try some of these projects with the kiddos. All photos by Melissa Fenlon. All rights reserved.


That shaving cream marbling is AMAZING! Do you scrape off the shaving cream while it’s still wet or wait until the paint dries a bit?
This kind of marbling is so fun, Lindsay! You scrape off the shaving cream while it’s still wet. I used a metal ruler to do the scraping. Worked like a charm 🙂 –Melissa
Hi, this is a grEat tutorial! I was jusT wondering, is it possible to marble multiple papers in one “bath”? OR do you have to make a fresh batch for every sheet of paper? Thanks a lot, love Floortje
Yes, we use the same “bath” a few times. And sometimes, we add a little bit more color to it, then use it again! Have fun 🙂