DIY Project – Image transfer on wood
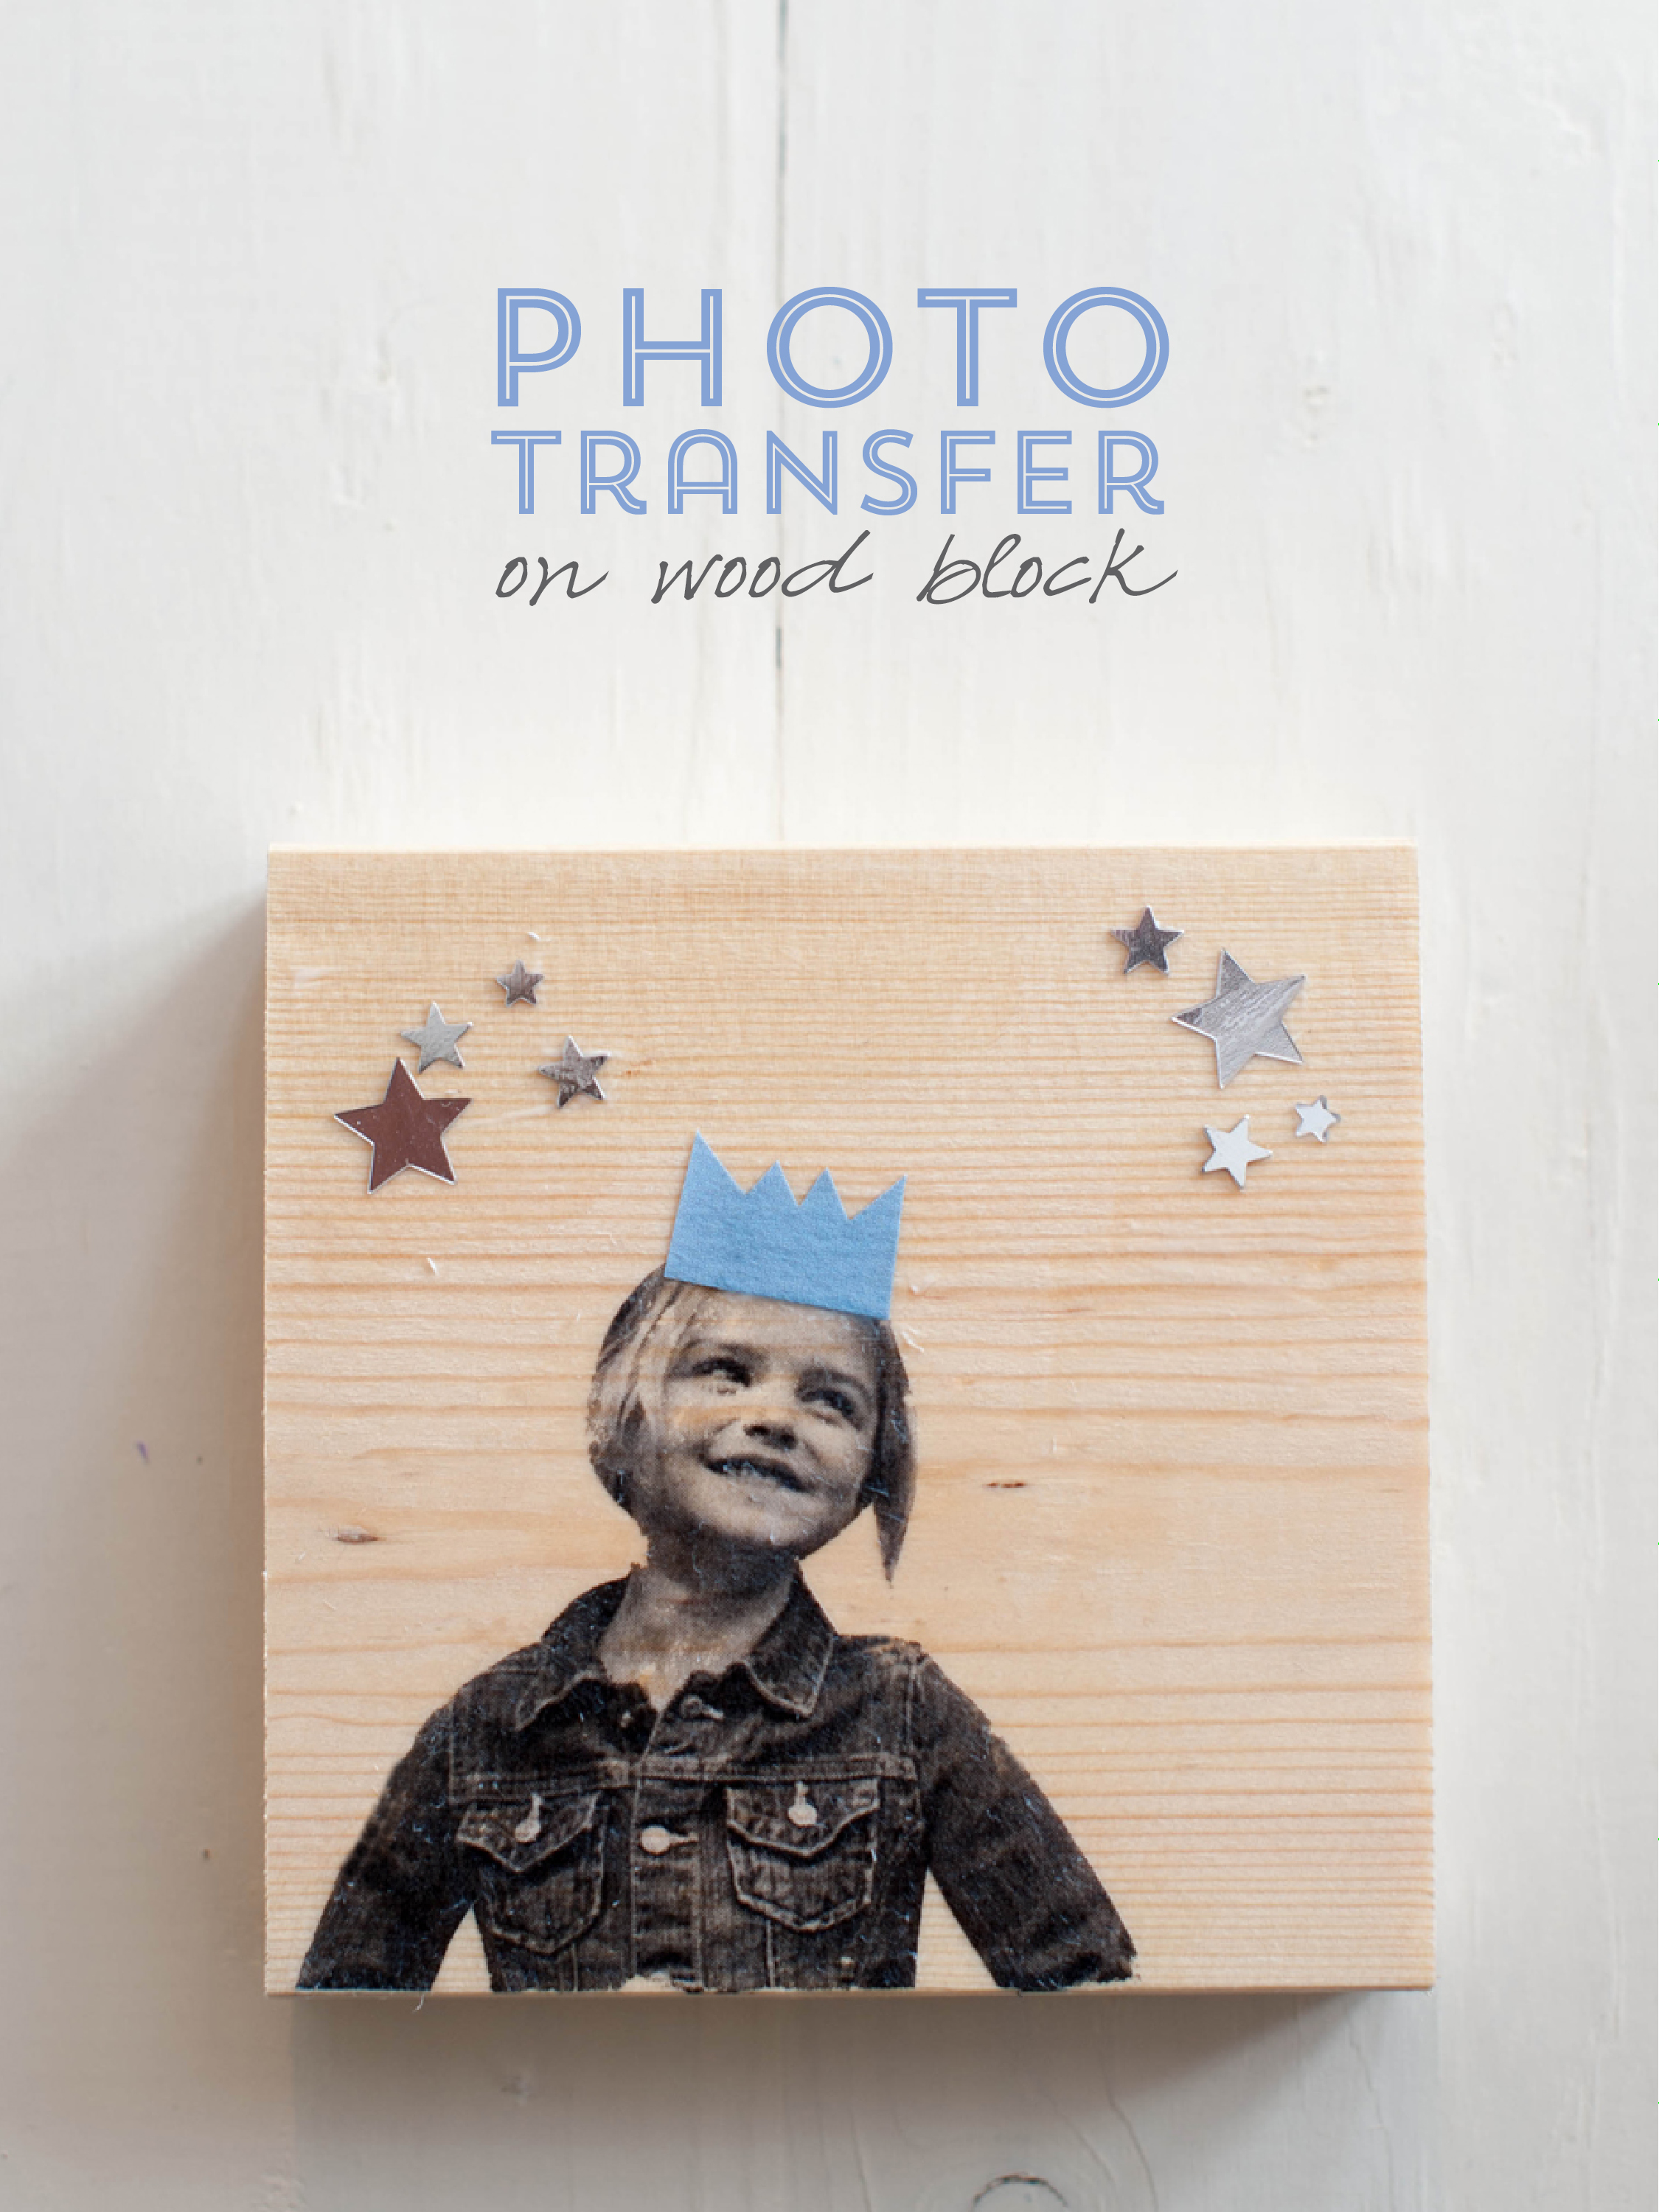 Here’s a unique DIY project for you. It’s an image transfer on to a wood block. It takes an hour tops and makes a one-of-a-kind creation out of your favorite photos.
Read more for the full tutorial…
Supplies: Black and white or color photo printed with laser printer, gel medium (I used Speedball Gel Medium), piece of sanded wood (I had a 1×4 cut down into square pieces from my local lumberyard), scissors, paintbrush, wet washcloth or sponge, any decorative additions
Directions:
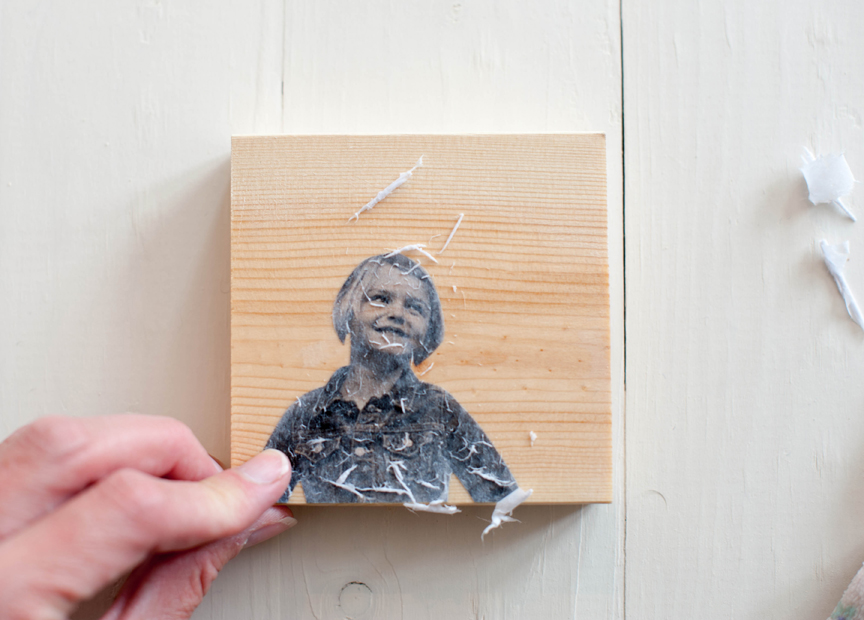
1. Cut out image. Best to cut to the very edge of photo.
2. Apply coat of gel medium to printed side of photo, then press firmly onto wood, image side down. It’s good to rub out any air bubbles with your finger or bone folder. Let it dry.
3. Lay wet washcloth or sponge on top of image for at least three minutes, until paper is totally wet. Start to very LIGHTLY rub paper off with your index finger. This part takes patience and a light touch. You want to rub all the paper pulp off, so just the ink is left that adhered to the wood. This takes me four to five repetitions– get it wet, rub lightly, then repeat. You want to remove all the white. If you rub too hard, you will rub off some of the ink.
4. Then add any decor you wish. I used some silver stars and made a crown out of paper. I applied those all with mod podge. And voila, you are done!


Beautiful!