DIY – Maxi Skirt tutorial
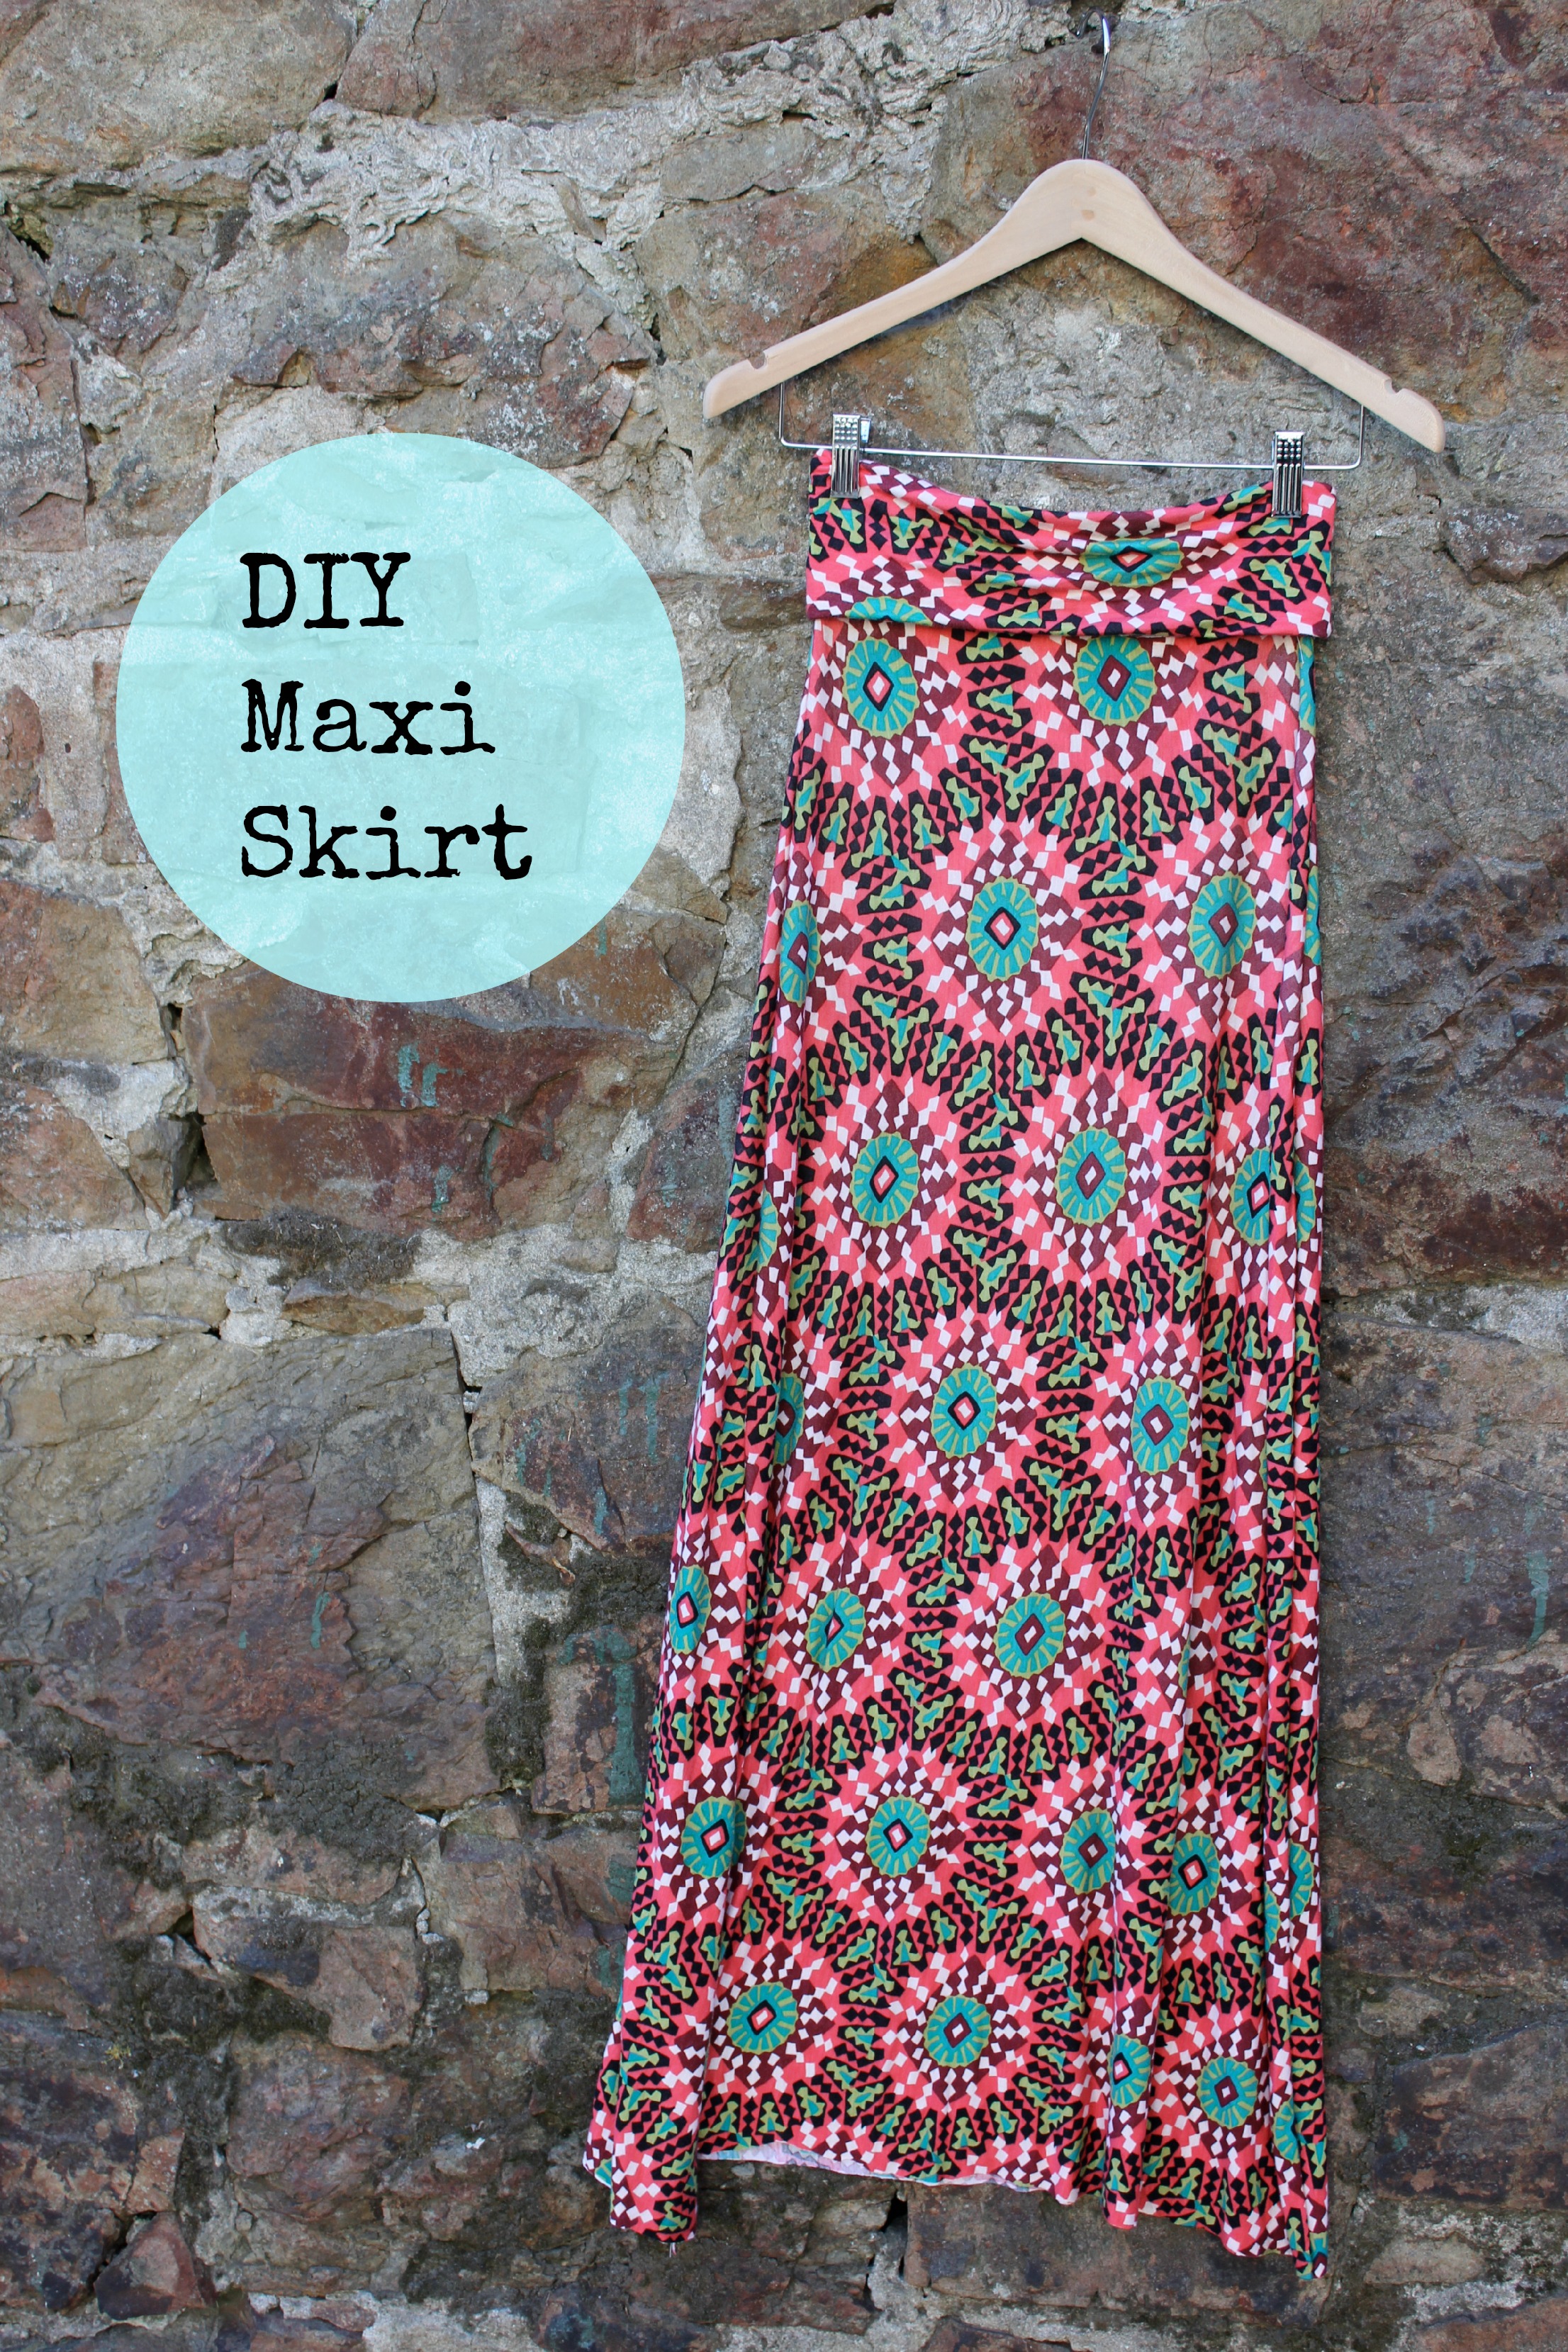
I have been obsessed with the ease of wearing jersey maxi skirts this summer and now fall. I had to try and make something for myself, right?!
I went to a great fabric warehouse in the Mission district to find some cheap stretch jersey fabric to make this skirt for myself. I used a skirt I already had as a pattern and it took me 30 minutes to make!
Supplies needed: maxi skirt from closet, sewing machine, ball point needle for machine, thread and 2 yards of stretch jersey fabric
Click read more for complete tutorial.
Directions:
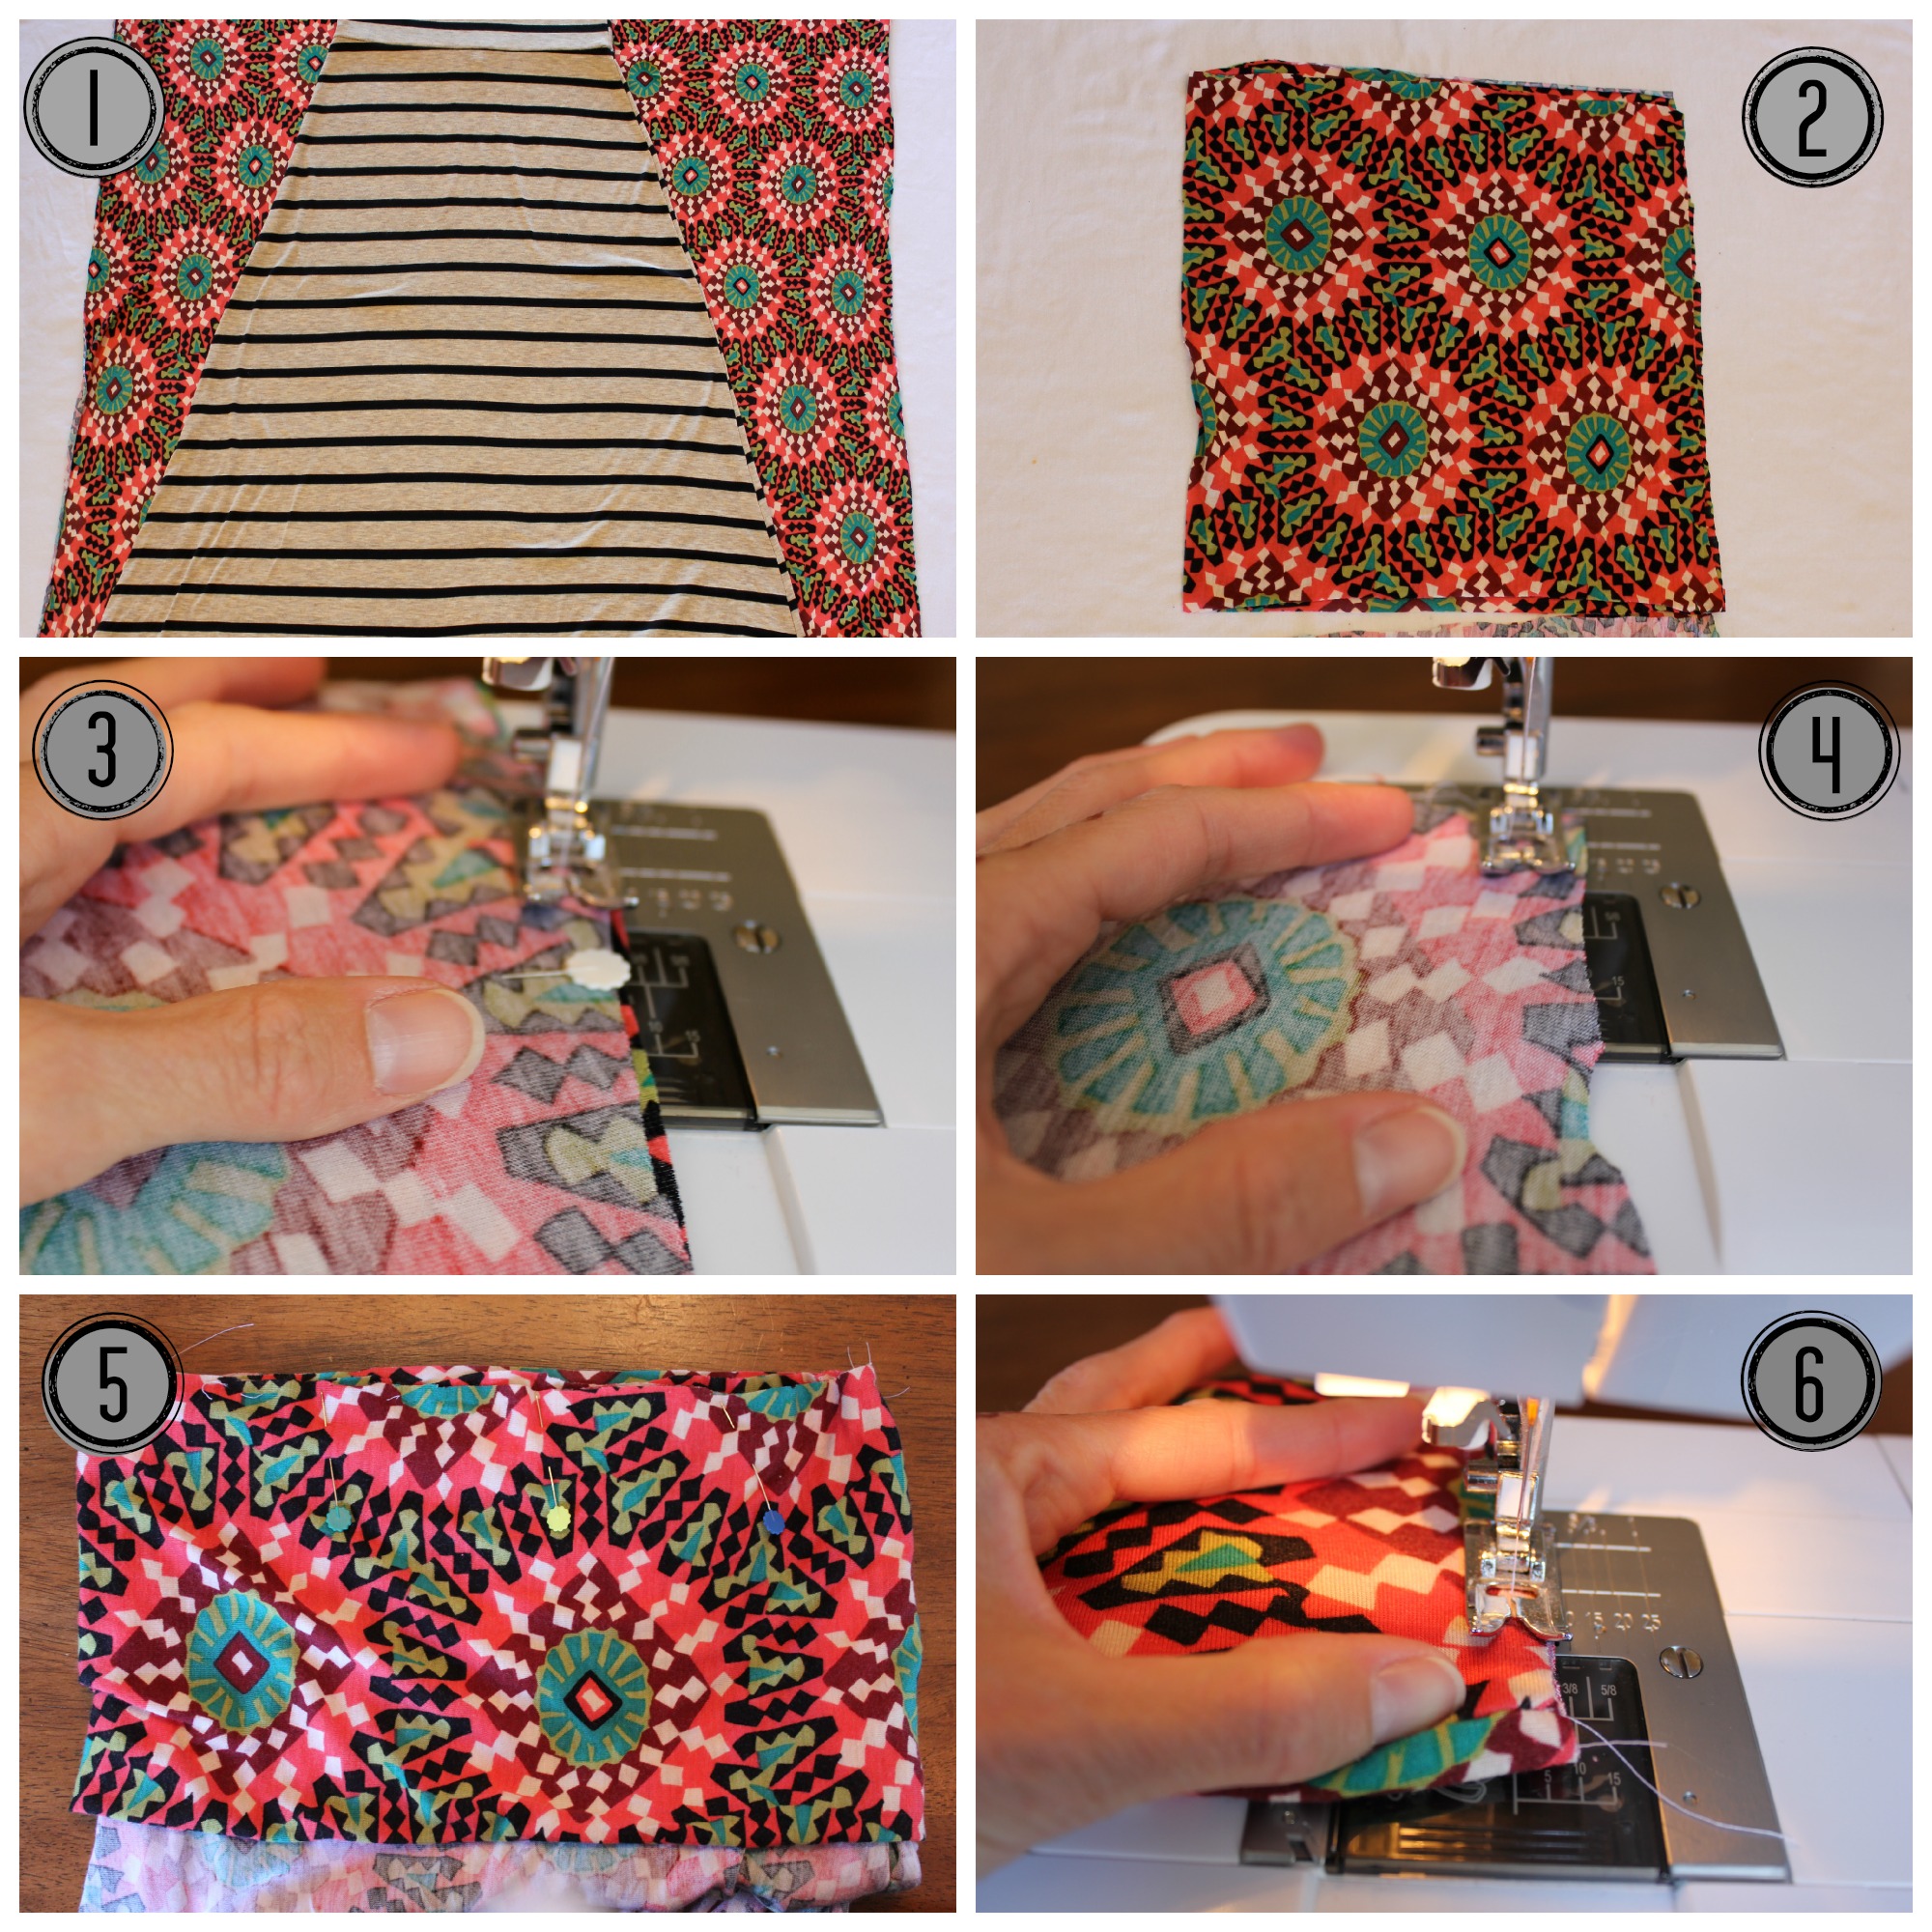
1. Lay current maxi skirt on one layer of new fabric. Trace the skirt part and cut 2 pieces of new jersey fabric (adding a half inch around for seam).
2. Measure your waist + 1 inch. Take that number and divide by 2. Use this number as the width of waistband and use 12 – 14 inches for length. Cut 2 pieces.
3. Skirt portion: right sides of fabric together, sew a zig zag stitch (for stretch) on the outer seams of skirt bottom.
4. Waistband: sew straight stitch on outer seams of waistband (left and right sides). This will create a circle.
5. Fold your circle in half with wrong sides together to make a thick circle. Place the circle over the top of the skirt body with the skirt body wrong side out. Pin in place matching up the side seams. All the raw edges should be matched up.
6. Sew using a zig zag stitch around the matched up edges of the skirt and waistband.
7. Turn your skirt right side out, flip the waist band over the top. You can tack the sides of the fold over waistband if you want. I left my seam edges raw since the jersey fabric will not fray.
Enjoy your new maxi skirt!
Sara
(all photos by Sara)


Hi,,i ame sometimes in San Francisco, couls you reveal me the address of the fabric store?
tks Caroline
Hi Caroline –
Fabric Outlet on Mission and 17th.
http://www.fabricoutletsf.com
Awesome selection of stretch jersey knits!
– Sara