DIY Leather Cast Iron Grip

Leave it to my clever and crafty friend Heather to help me come up with my next DIY project for the blog. She has a wonderful stash of scrap leather that she lets me dig into for blog projects – like this clutch, hair clips, and our rope basket with leather handles. So when she was crafting up a cast iron pan handle holder from her stash I knew I had to make one for myself and share on the blog. This project took 5 minutes to make! This DIY is so simple! I opted for using rivets to secure the leather together. You could hand stitch using heavy needle and waxed thread, but rivets are so much easier.
Get the full tutorial for DIY Leather Cast Iron Grip after the jump…
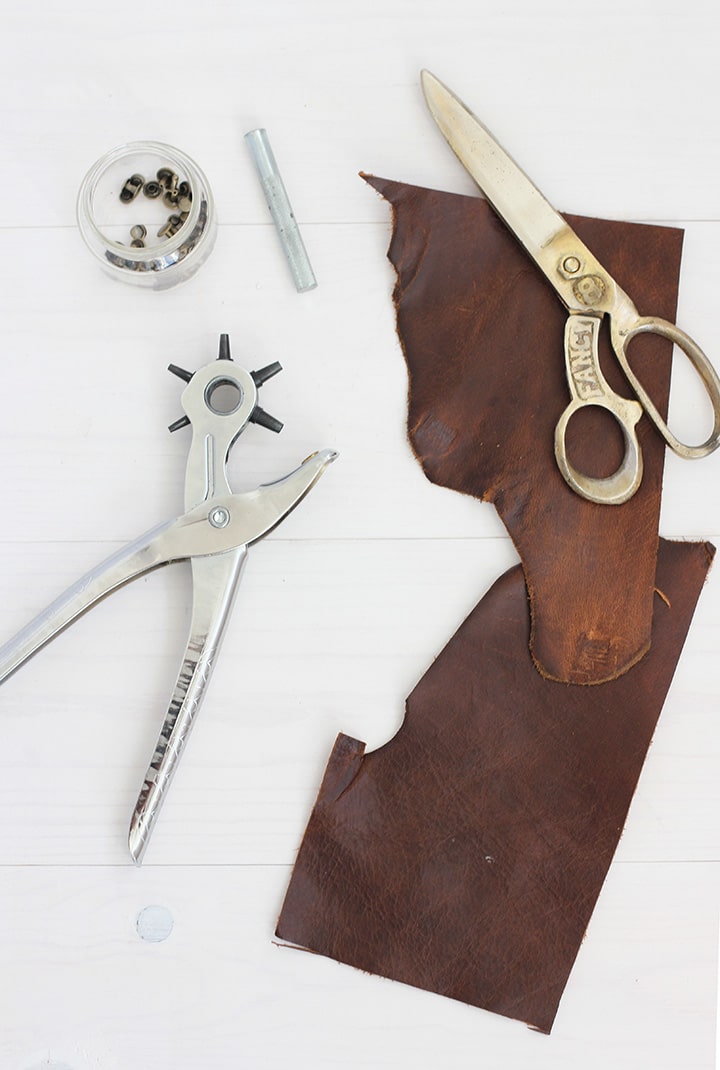
Supplies
– Leather 4.5 inches width x 4 and 5/8 inches height
– sharp scissors
– Leather Hole Punch (or sharp hold punch)
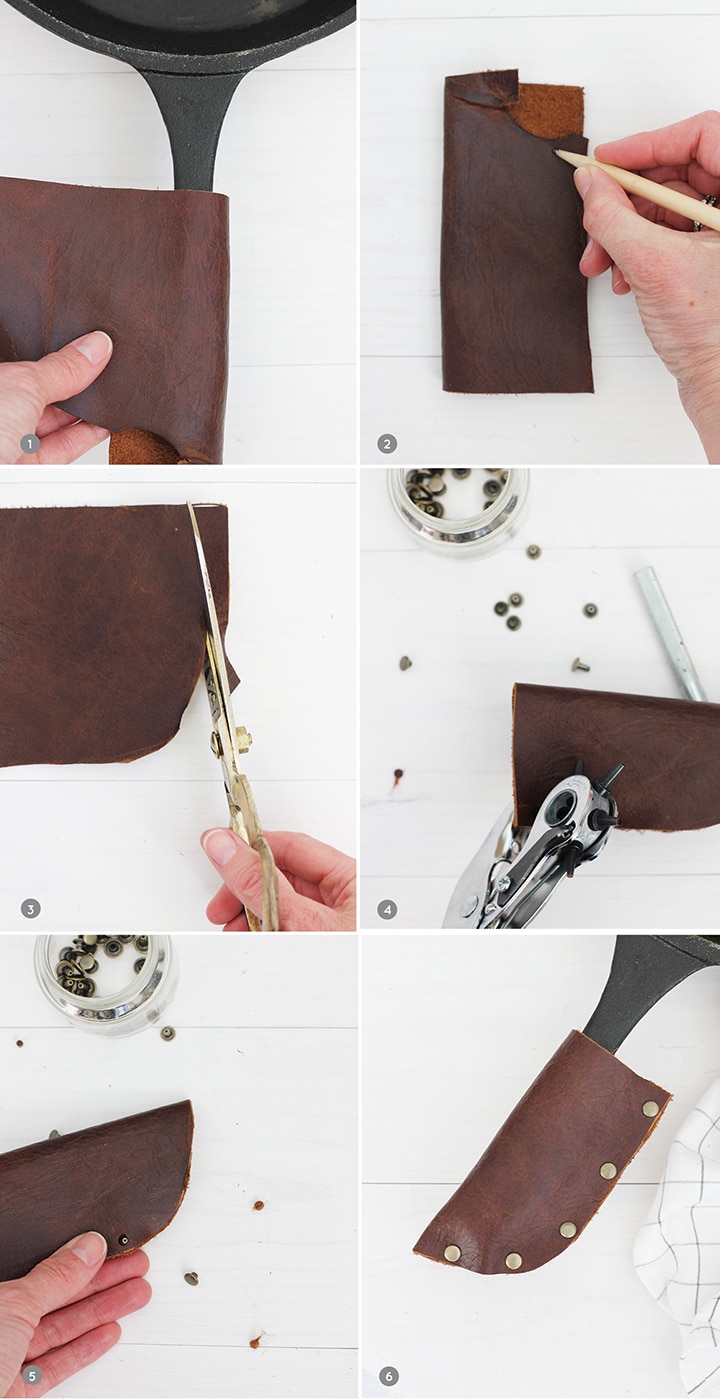
Steps
1. Create your own pattern by wrapping leather around your pan’s handle to measure.
2. Lightly mark a U-shape on the leather.
3. Using sharp scissors, cut the U-shape.
4. Mark where you want the rivets. I put 5 rivets to secure the leather U-shape together. Punch holes using a leather hole punch.
5. Place the rivets in the holes and hammer the rivets together.
6. Use the cast iron grip on your skillets. Make sure not to leave the grip on the entire time you are cooking. Just slide it on when using handle of pan. If you leave it on the entire cooking process the metal rivets may get hot.


Photos by Sara Albers. all rights reserved.


This is so smart – love it!
Thanks Lindsay!
such a good idea! One questions — do the rivets heat up when they’re on the pan?
I do not leave the “sleeve” or grip on the entire cooking time, so mine do not. But I can imagine they might if you leave the grip on the entire time.
ah, yes. Thank you!